You’re stuck in an airport longer than your patience, your eyelids are losing a battle, and the floor starts to look… not terrible. This isn’t about glamor. It’s about comfort, safety, and not missing your boarding call. You’ll get quick answers, a step-by-step plan to find the right spot, real examples from big hubs, and a no-nonsense checklist so you can actually rest-without waking up to a missing bag or missed flight.
TL;DR: Where to Sleep in an Airport, Fast
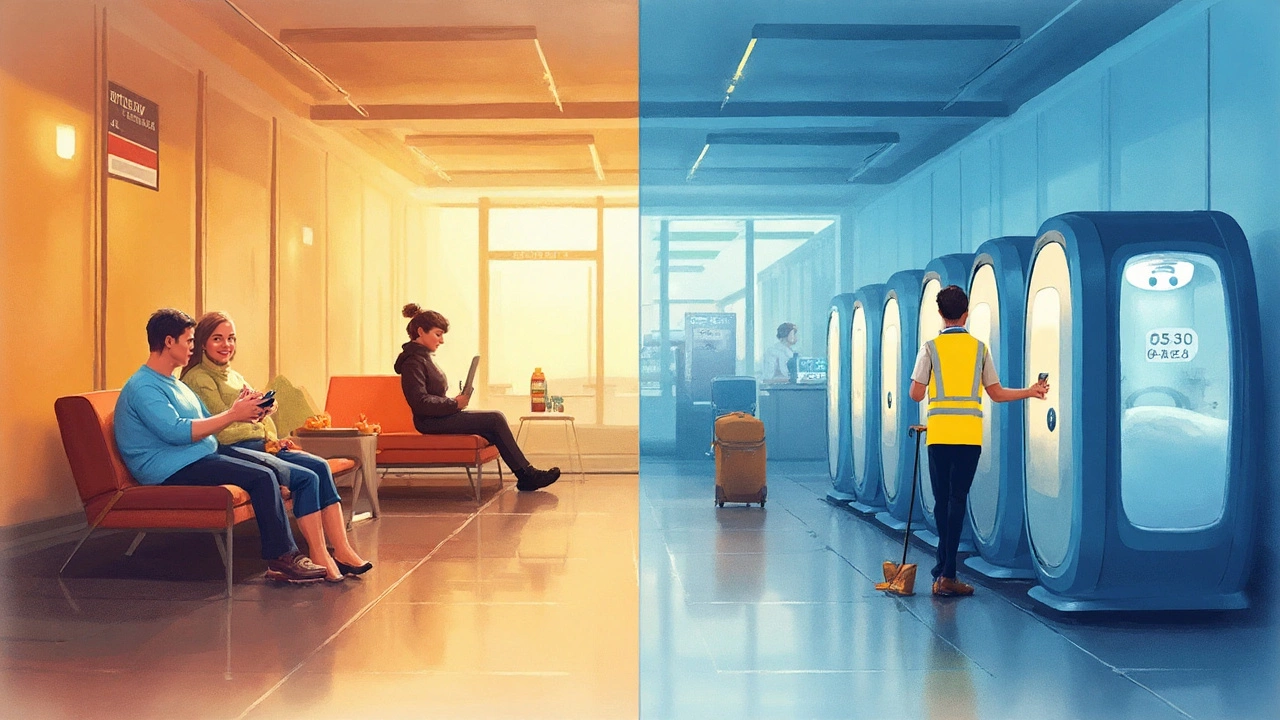
- Best bet: quiet/relaxation zones, empty gates away from main corridors, or pay-by-hour sleep pods. Lounges work if they’re open late and allow horizontal rest.
- Landside vs airside: sleep airside if the terminal stays open; if security closes overnight (common in Europe), secure a landside spot near 24/7 cafes or info desks.
- Safety first: choose a well-lit area near cameras, keep valuables on you, and set 2 alarms. If it feels sketchy, move. No nap is worth a risk.
- Backup plan: Minute Suites/NapCabs/pods ($10-$70/hour), or a day room at an airport hotel ($80-$150 for 4-6 hours).
- Quick comfort kit: eye mask, earplugs, hoodie/scarf, power bank, long cable, wipes. Pick a spot where announcements aren’t blaring into your skull.
Step-by-Step: Pick the Right Spot and Set Up
Here’s a clean, no-drama process that works in almost any terminal. I’ve used it on too many late-night connections and budget-airline oopsies.
- Check the rules and hours. Look up if the terminal is 24/7 and when security reopens. Many European airports close airside overnight; you’ll be sent landside until 4-5 a.m. In the U.S. and Asia, airside often stays open, but sections still shut for cleaning.
- Decide landside vs airside.
- Airside is usually quieter with fewer non-passengers and better seating. Great if security stays open and your connection is same-day.
- Landside is your only option if security is closed. Look for 24/7 zones and stay near activity (but not in the loudest area).
- Scout three zones, fast. Walk 5-10 minutes and compare:
- Far-end gates (often empty at night, softer announcements).
- Designated rest/quiet areas (recliners, dim lights, charging ports).
- Near 24/7 cafes/info desks (safer feel, staff nearby, but noisier).
- Do a quick safety check. Look up for cameras, choose open sightlines, and avoid dead corners. Keep your bag on your body: strap it to your ankle or use it as a pillow with zips inward. As a solo woman, I also keep my shoes on, hoodie up, and earbuds in but not blasting.
- Set up like you mean it. Lay a scarf/hoodie down if the seat’s cold. Use an eye mask. Earplugs + low-volume white noise can drown announcements. Coil your long charging cable under your jacket so it doesn’t flag attention.
- Lock in wake-up protection. Two alarms (phone + watch) and a volume test. If you’re nervous, ask the overnight cafe staff to tap you at a specific time; many will if you’re nice and clear.
Quick heuristic: if the spot checks three boxes-dim, distant from PA speakers, and near power-you’ve scored. If two are missing, keep walking.

Best and Worst Places to Sleep (with a quick comparison)
Not all benches are equal. Here’s how the usual suspects stack up when you’re weighing comfort vs safety vs sanity.
| Location | Comfort | Noise | Power Access | Privacy | Safety Feel | Notes |
|---|---|---|---|---|---|---|
| Quiet/Relaxation Zones (airside) | High (recliners) | Low | Often built-in | Medium | High | Great first choice; fills up fast near midnight. |
| Far-End, Unused Gates | Medium | Low-Medium | Variable | Medium | Medium-High | Announcements softer; watch for late gate changes. |
| Near 24/7 Cafes/Info Desks (landside) | Medium | Medium-High | Good | Low | High | Trade noise for social safety and lighting. |
| Lounges (24/7 or late) | High (sofas) | Low | Excellent | Medium | High | Rules vary; some ban lying flat. Shower option is gold. |
| Sleep Pods (NapCabs/Minute Suites) | High (flat) | Low | Excellent | High | High | Paid; book early near midnight peaks. |
| Prayer/Chapel Rooms | - | Low | - | - | - | Not for sleeping. Be respectful; do not use. |
| Gate Areas by Main Corridors | Low | High | Good | Low | Medium | Bright lights, constant foot traffic; last resort. |
| Under Stairs/Behind Planters | Medium | Low | Poor | High | Low | Avoid hidden corners. Security may move you. |
Rule of thumb if you’re torn: choose visibility over isolation, and predictable activity over total silence. You’ll sleep better when you feel safe.
Costs snapshot (2025 typical): Minute Suites in major U.S. hubs run about $55-$70 for the first hour, then less per additional 15 minutes; NapCabs in Germany/EU often charge €15-€18 per 30 minutes; GoSleep pods in Finland hover around €10-€12 per hour; Sleep ‘n Fly in Dubai is roughly AED 75-95 per hour depending on pod type. Day rooms in airside microhotels like YOTELAIR often land between $80 and $150 for 4-6 hours. Prices flex by terminal and demand-near midnight and early morning cost more and sell out faster.
Real Examples: What Works at Big Hubs in 2025
Airport policies change, but patterns don’t. Here’s what actually helps in major hubs this year, so you can adapt fast even if you’ve never been there.
- Singapore Changi (SIN): Still the gold standard. Multiple rest zones with recliners, softer lighting, and ample charging points. Showers in some terminals. If one zone is packed, walk 5-10 minutes; there’s usually space.
- Doha Hamad (DOH): Quiet Rooms are separated by gender with loungers and dim lights. They fill up around midnight, so do a quick circuit and commit. Keep a light layer; A/C runs cool.
- Istanbul (IST): Paid sleep pods around main piers; fast turnover after 2 a.m. If you’re saving money, scout far-end gates; the building is huge and quiet pockets exist.
- Helsinki (HEL): Known for GoSleep pods and calm terminals. If pods are booked, check the edges of gate areas; Finns like quiet, and the design reflects it.
- Munich (MUC): NapCabs inside terminals, decent soundproofing. If you’re not paying, the quieter seating zones are away from retail spines-follow the long corridors.
- Dubai (DXB): Sleep ‘n Fly pods/cabins across terminals. Free rest areas exist but are busier due to 24/7 traffic. Avoid seating under PA speakers; they’re loud and frequent.
- U.S. hubs (ATL, DFW, CLT, PHL): Minute Suites are clutch for red-eyes or weather delays. Many terminals stay open, but sections close for cleaning. Announcements drop off after midnight in side concourses.
- London (LHR): Terminals stay open but security may push you landside at night if you’ve no same-day connection. Staff sometimes discourage sleeping on the floor. Choose benches near cafes on the landside if needed.
- Paris (CDG): Airside often closes overnight in specific terminals. Expect to be landside with more noise. Pick a lit area with cameras, and set dual alarms.
- Tokyo (HND/NRT): Clean, orderly, and often quiet, but terminal and security hours vary by pier. Check the day’s schedule; don’t assume all-night access to your gate.
Traffic rhythms help too. According to Airports Council International’s 2024 traffic patterns, peaks typically hit early morning (7-10 a.m.) and early evening (5-8 p.m.). If you need a solid nap, aim for the lull between 1-4 a.m. or the mid-afternoon dip. Your exact terminal could differ, but those windows are a safe bet.
One more note on announcements: in most terminals, the farther you walk from retail and main atriums, the fewer flight calls you’ll hear. If it sounds like a mall, keep moving until it sounds like a library.

Pack Lists, Pro Tips, FAQs, and What to Do If Things Go Sideways
There’s no perfect nap in a fluorescent building, but you can stack the odds. Here’s the kit and the playbook I use when a layover mutates into a sleepover.
Cheat-sheet packing list (carry-on pocket):
- Eye mask and foam earplugs (plus a backup pair).
- Light scarf or hoodie (doubles as pillow/blanket; A/C runs cold at night).
- 10,000 mAh power bank and a 2m charging cable (short cables force awkward sleeping angles).
- Travel pillow or inflatable neck pillow that flattens quickly.
- Sanitizing wipes, lip balm, small moisturizer (air is dry; keep it simple).
- Snacks that don’t crumble and a refillable bottle (many airports have 24/7 water fountains).
- Compression socks if your legs swell; they help when you sleep semi-upright.
5 pro moves that matter:
- Pick seating with fixed armrests? Sit slightly sideways with a rolled hoodie as a wedge for lower back support. Your spine will thank you in the morning.
- Put your passport, phone, and cards in an inner pocket or cross-body pouch you keep on while you sleep. Bag locks help, but proximity is better.
- Charge to 80% before sleeping, then top up after. It’s enough to last and kinder to batteries for overnight cycles.
- White noise on low, not music. You want to dampen the roar, not miss security’s gentle wake-up if they need you to move.
- Pick a spot you can describe to yourself. If you wake groggy, you should still know which gate you’re near and which direction your gate is in.
What not to do (common mistakes):
- Don’t sleep in hidden corners, storage alcoves, or behind planters. Security will move you, and it’s less safe.
- Don’t sprawl across high-traffic corridors; you’ll be woken repeatedly.
- Don’t count on lounge access last-minute. Many close by midnight or stop entry hours before closing.
- Don’t use prayer rooms/chapels to sleep. It’s disrespectful and you’ll be asked to leave.
- Don’t rely on a single alarm. Your future self will forgive the extra beeps.
Mini-FAQ
- Am I allowed to sleep in an airport? Usually, yes-if the public/secure area is open. Policies vary. Security or staff can wake you if you block aisles, sleep in restricted zones, or if the terminal closes for the night.
- Will I be safe? Airports are monitored, but stay in visible, well-lit spots near foot traffic. Keep valuables on your body, and trust your gut. If something feels off, move.
- Do I need a boarding pass? To be airside, yes-and within the time window for your flight/connection. Landside public areas usually don’t require one.
- Best free sleep option? Designated quiet/rest areas or far-end unused gates with softer announcements and nearby outlets.
- Best paid option? Pods/suites if you want a guaranteed flat surface and privacy. If you also want a shower and food, a lounge or microhotel day room wins.
- How much do pods cost? Roughly $10-$70 per hour depending on brand and airport, often more during midnight peaks. Microhotels: $80-$150 for a 4-6 hour block.
- What about families with kids? Look for family rooms or kid zones (some stay open late). Spread a blanket on carpeted areas near your gate and make a “nest.” Keep all documents zipped on you.
- What about accessibility? Ask for a quiet waiting area near accessible restrooms and power. Most airports will guide you to a safer, calmer spot if you request assistance.
Decision guide: free spot, lounge, or pod?
- If you’ve got under 2 hours: Free spot. You’ll waste paid time settling in.
- 2-4 hours, need quiet: Lounge if open; otherwise, far-end gates or rest zones.
- 4+ hours or you’re wrecked: Pod/microhotel. Your back and brain will perform better the next day.
- Nervous about safety (solo night): Lounge or paid pod if budget allows; otherwise, landside near 24/7 staff with cameras visible.
If things go sideways
- Terminal closes airside: Head landside before the sweep. Stake a spot near 24/7 food or info. Re-clear security when it opens.
- All quiet zones are full: Walk to the farthest pier from the main junction. Noise and crowds drop with every 200-300 meters.
- Security wakes you: Be polite, move where they ask, and reset your alarms. It’s routine.
- Feeling unsafe: Relocate to brighter, busier seating. If needed, ask staff for a recommended waiting area.
- Missed connection after sleeping: Go straight to your airline’s transfer desk. Document gate-change times and alarms if asked-it helps your case for rebooking, especially during disruptions.
Lounge vs pod vs hotel: when to pay
- Pay for a lounge if you value showers, food, Wi‑Fi, and you can rest on sofas. Some lounges don’t allow lying flat; check house rules at the desk.
- Pay for a pod/suite if you need darkness, a door, and a guaranteed flat surface. Great for jet lag flips.
- Pay for a microhotel if you need 4-6 hours, a private bathroom, or are traveling with kids who sleep better behind a real door.
Safety note that actually helps: choose a spot where staff can see you, not where no one can. Clip your bag strap around your leg or belt loop. Keep zippers inward. It’s simple and effective.
Finally, if you typed “where to sleep in airport” at 1 a.m. from a freezing gate, here’s your quick script: pick a far, quiet gate or a marked rest zone, stash your valuables on-body, set two alarms, and sleep with your back to a wall and your bag touching you. If your gut says move, move. You’ll wake up less groggy and a lot less stressed.
